Limoncello Pear Tart
Highlighted under: Taste the World
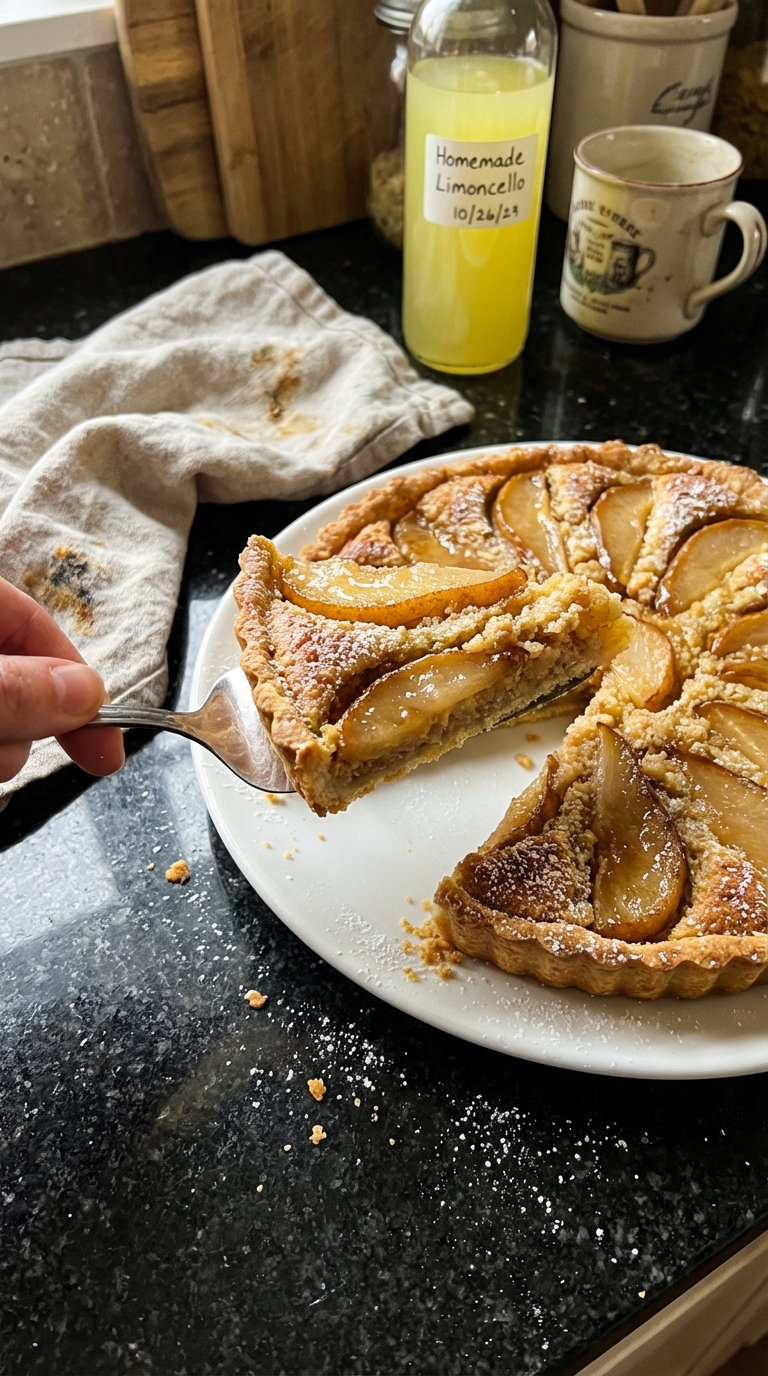
I absolutely adore making this Limoncello Pear Tart! The combination of sweet, ripe pears and the zesty kick of limoncello creates a dessert that is both refreshing and indulgent. Each bite transports me to a sunny Italian piazza, where the flavors dance on my palate. It’s surprisingly simple to prepare, and I love how the buttery crust perfectly complements the juicy fruit filling. This tart never fails to impress my friends and family, making it a favorite at gatherings and celebrations alike!
When I first attempted to create this Limoncello Pear Tart, I was amazed by how well the bright, citrusy notes paired with the sweetness of the pears. After playing around with different crusts, I found that a buttery shortcrust really brings out the flavors and supports the filling perfectly. I suggest chilling the dough for at least 30 minutes before rolling it out, as it helps maintain a flaky texture.
During subsequent tries, I started to add a hint of vanilla to the pear filling, enhancing the overall flavor profile. The tart is best enjoyed the day after it's made—allowing the flavors to meld beautifully overnight. It's a stunning addition to any dessert table!
Why You'll Love This Tart
- A delightful blend of fresh pear sweetness and zesty limoncello
- Buttery, flaky crust that melts in your mouth
- Impressive presentation for special occasions
Perfecting the Tart Crust
When making the tart crust, it's crucial to use chilled ingredients. This helps achieve that buttery, flaky texture we all love. I recommend chilling the butter and even the flour for about 15 minutes before starting. This prevents the butter from melting too quickly and resulting in a tough crust. If you're short on time, you can also use a food processor for quick mixing, but be careful not to over-process, as you want to maintain some pea-sized bits of butter in the mixture for that ideal flakiness.
After mixing, wrapping the dough in plastic and chilling it for at least 30 minutes is non-negotiable. This resting period allows the gluten to relax, which results in a more tender crust. If you plan to prepare the tart crust ahead of time, you can keep it in the fridge for up to 2 days or freeze it for about a month. Just remember to thaw it in the refrigerator overnight before rolling it out.
Tips for the Perfect Filling
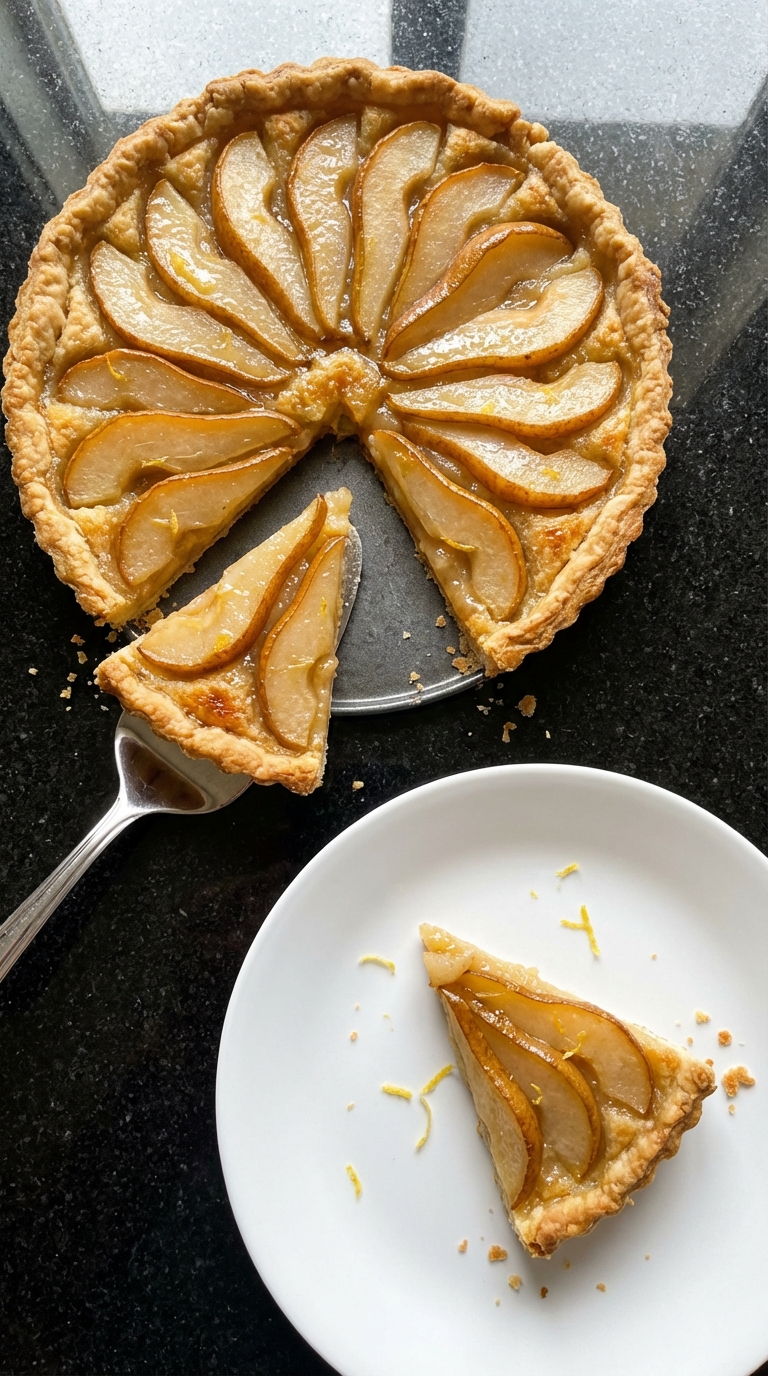
Choosing the right pears is key to achieving the best flavor and texture. Opt for ripe yet firm varieties like Bartlett or Bosc as they hold their shape well during baking. Overripe pears might turn mushy and lose that satisfying bite. When slicing, aim for even slices to ensure uniform cooking, allowing the natural juices to meld beautifully with the limoncello and sugar.
The limoncello elevates the dish with brightness, but you can experiment with alternatives. If you prefer a non-alcoholic version, replace limoncello with a lemon simple syrup mixed with a splash of sparkling water for a similar flavor profile. Just adjust the sugar in the filling to balance the sweetness. For variety, adding a pinch of cinnamon or nutmeg to the filling can introduce a warm, aromatic undertone that pairs nicely with the pears.
Serving and Storage Ideas
Serving this tart warm allows the filling to be at its juiciest and most aromatic, but it also tastes lovely chilled. Consider topping it with whipped cream or a scoop of vanilla gelato to enhance the experience. If you're feeling a bit adventurous, a drizzle of honey or a sprinkle of toasted almonds can add an unexpected crunch and flavor dimension that’s sure to impress your guests.
After cooling, any leftover tart can be stored in an airtight container in the refrigerator for up to three days. To reheat, place individual slices in the microwave for about 15-20 seconds or warm in an oven preheated to 350°F (175°C) for about 10 minutes, ensuring you don’t dry it out. Freezing is also an option, but for optimal texture, I recommend freezing slices separately to avoid sogginess.
Ingredients
For the Tart Crust
- 1 ½ cups all-purpose flour
- ½ cup unsalted butter, chilled and cubed
- ¼ cup powdered sugar
- 1 large egg yolk
- 1-2 tablespoons cold water
For the Filling
- 3 ripe pears, peeled, cored, and sliced
- ½ cup limoncello
- ¼ cup granulated sugar
- 1 teaspoon vanilla extract
- 1 tablespoon lemon juice
- 1 tablespoon cornstarch
Make sure the pears are ripe for the best flavor.
Instructions
Prepare the Tart Crust
In a large bowl, mix the flour and powdered sugar. Cut in the butter until the mixture resembles coarse crumbs. Stir in the egg yolk and add cold water, one tablespoon at a time, until the dough forms. Wrap in plastic and chill for at least 30 minutes.
Make the Filling
In a separate bowl, combine the sliced pears, limoncello, sugar, vanilla extract, lemon juice, and cornstarch. Toss until the pears are evenly coated.
Bake the Tart
Preheat the oven to 350°F (175°C). Roll out the chilled crust on a floured surface and fit it into a tart pan. Pour the pear filling into the crust. Bake for 35-40 minutes or until the crust is golden and the filling is bubbly.
Cool and Serve
Remove from oven and let the tart cool slightly before serving. Enjoy it warm or chilled!
For added flavor, serve with whipped cream or a scoop of vanilla ice cream.
Pro Tips
- Let the tart cool for at least 10 minutes before slicing to help maintain its shape. Consider garnishing with lemon zest for an extra touch of brightness.
Ingredient Roles
The unsalted butter in the crust provides richness and flavor, while its fat content helps create that melt-in-your-mouth texture. If you’re out of unsalted butter, unsalted margarine or coconut oil can serve as substitutes, but both may alter the flavor slightly. I appreciate using cold butter to ensure little pockets remain that can steam during baking, leading to a flakier finish.
In the filling, limoncello not only adds a beautiful citrus flavor but also helps to soften the pears without overwhelming their natural sweetness. The cornstarch is crucial in this recipe as it acts as a thickening agent, absorbing excess liquid released from the pears while baking, thus preventing a soggy tart. For a gluten-free option, cornstarch can be replaced with an equal amount of arrowroot powder.
Troubleshooting Common Issues
If your crust shrinks while baking, it could be due to the dough being overworked or not chilled long enough. Make sure to handle the dough minimally and chill it thoroughly before baking. Pie weights can also help prevent shrinkage when baking; simply line the crust with parchment paper and fill it with weights or dried beans during the initial bake to maintain its shape.
Another common issue might be undercooked filling, leading to a runny consistency. Ensure you have even slices of pears to promote even cooking and consider baking the tart until the top is golden brown, and the filling bubbles slightly. Checking visual cues like a slight jiggle in the center can also guide you; it should be set but still slightly wobbly as it will firm up as it cools.
Questions About Recipes
→ Can I use other fruits for this tart?
Yes, you can experiment with other fruits like apples or peaches, but adjust the sugar and lemon juice accordingly.
→ How do I store leftovers?
Store the tart in the refrigerator for up to 3 days, covered with plastic wrap or foil.
→ Can I freeze the tart?
Yes, you can freeze the tart for up to 2 months. Thaw it in the refrigerator before serving.
→ What can I serve with the tart?
Serve it with whipped cream, vanilla ice cream, or a dollop of mascarpone for an extra treat.
Limoncello Pear Tart
Created by: The Flavorhandbook Team
Recipe Type: Taste the World
Skill Level: Intermediate
Final Quantity: 8 servings
What You'll Need
For the Tart Crust
- 1 ½ cups all-purpose flour
- ½ cup unsalted butter, chilled and cubed
- ¼ cup powdered sugar
- 1 large egg yolk
- 1-2 tablespoons cold water
For the Filling
- 3 ripe pears, peeled, cored, and sliced
- ½ cup limoncello
- ¼ cup granulated sugar
- 1 teaspoon vanilla extract
- 1 tablespoon lemon juice
- 1 tablespoon cornstarch
How-To Steps
In a large bowl, mix the flour and powdered sugar. Cut in the butter until the mixture resembles coarse crumbs. Stir in the egg yolk and add cold water, one tablespoon at a time, until the dough forms. Wrap in plastic and chill for at least 30 minutes.
In a separate bowl, combine the sliced pears, limoncello, sugar, vanilla extract, lemon juice, and cornstarch. Toss until the pears are evenly coated.
Preheat the oven to 350°F (175°C). Roll out the chilled crust on a floured surface and fit it into a tart pan. Pour the pear filling into the crust. Bake for 35-40 minutes or until the crust is golden and the filling is bubbly.
Remove from oven and let the tart cool slightly before serving. Enjoy it warm or chilled!
Extra Tips
- Let the tart cool for at least 10 minutes before slicing to help maintain its shape. Consider garnishing with lemon zest for an extra touch of brightness.
Nutritional Breakdown (Per Serving)
- Calories: 280 kcal
- Total Fat: 16g
- Saturated Fat: 10g
- Cholesterol: 55mg
- Sodium: 180mg
- Total Carbohydrates: 30g
- Dietary Fiber: 2g
- Sugars: 15g
- Protein: 3g